
"The Mosin-Nagant is an accurate rifle, properly set up. You don't have to settle for mediocre accuracy, and neither do you need to make permanent changes."
Time has only affirmed my believe in the Mosin-Nagant. Since that article last year, I've studied Finnish Mosins, namely M27, M28, and M39 rifles as well as their variants, both in person and via type. These experiences have led me to the facts and opinions expressed in this article.
Let's define accuracy, and then precision: Accuracy is the ability of the rifle to hit where it's aimed. Precision is the ability of the rifle to be repeatedly accurate; that is, to hit the target in the same place every time. No firearm is perfectly precise, though some modern competition rifles come close. Most rifles have more mechanical precision than the rifle's operator can use!
Let's first look at allowing the operator to take as much advantage as possible from the rifle's mechanical precision.
The Trigger
It's long been known that a good trigger is essential for good shooting. For a very short time I sold a version of the M39 trigger and was working on a two-stage when I found out that I could be easily sued even if the trigger hand no flaw. Currently M39 triggers are sold on Gunbroker and elsewhere.
Here is my setup:
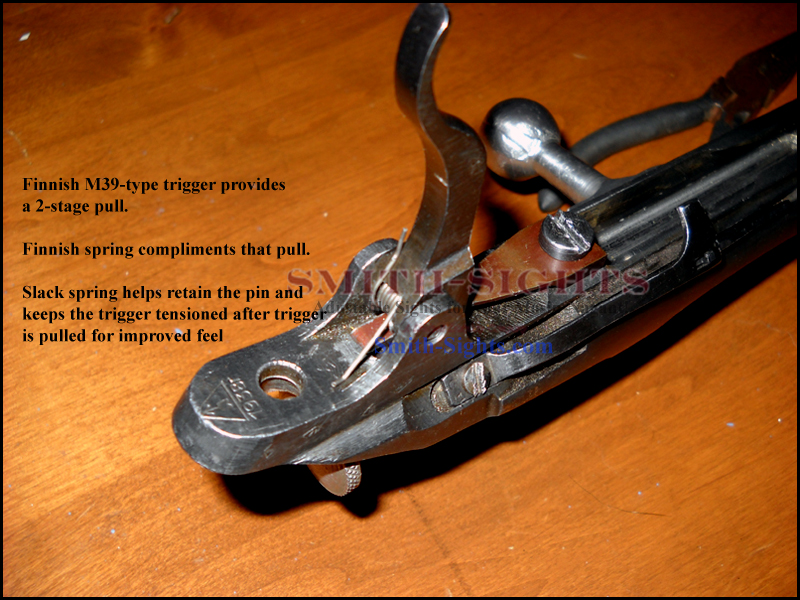
Because the refinement of the Mosin-Nagant trigger could be the subject of a whole article, I'll not go into it here further than to say that this is now the best trigger I've felt on any military rifle and most civilian rifles, definitely better than any Mauser I've found. The next-best is on a 120-year-old Gewehr M88/05 I have.
The Sights
I don't have to tell most of you how critical good sights are. You're here aren't you?
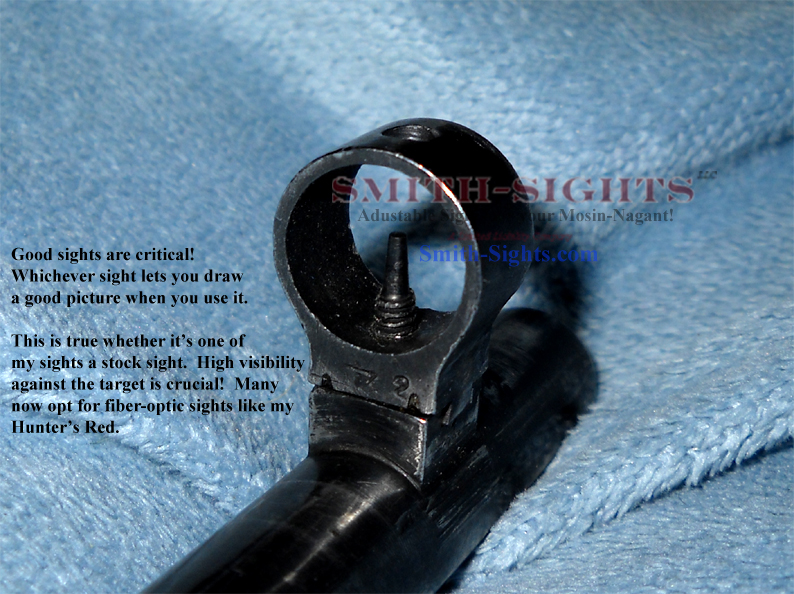
The front sight must be visible against the target at which you're shooting. If it's not, you will not score good hits.
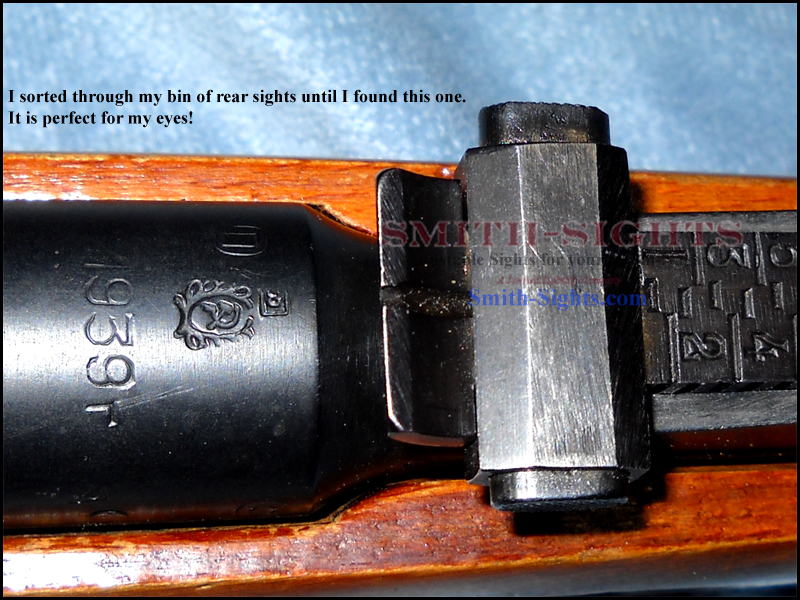
The rear sight must complement the front sight. I picked this one because it has a nice, deep, uniform notch, very crisp on the edges and less of a crude military sight. This one is an earlier Tula, but I have some others that are Izhevsk and nearly as nice. There does not seem to be any practical difference between the pre-war Tula and Izhevsk sights.
Bedding and Shimming
Now we come to the meat of this article. In the article I did a year ago, I suggested shimming with cork gasket material and using the same gasket material to bed the barrel. While this works, a year's worth of experimentation has yielded better precision with the following setup.
![]()
Begin by cutting a brass shim, 0.032" thick, and installing it in front of the recoil lug cross bolt. The Finns often used a thinner shim directly above the cross bolt. As you can see I tried that, but didn't like it as much.
A shim in either location raises the receiver and floats the barrel.
![]()
Now you have a floated barrel. This is good for bull barrels but not for limp, pencil-type barrels. You'll need to add known pressure points. This is where the cork comes back in!
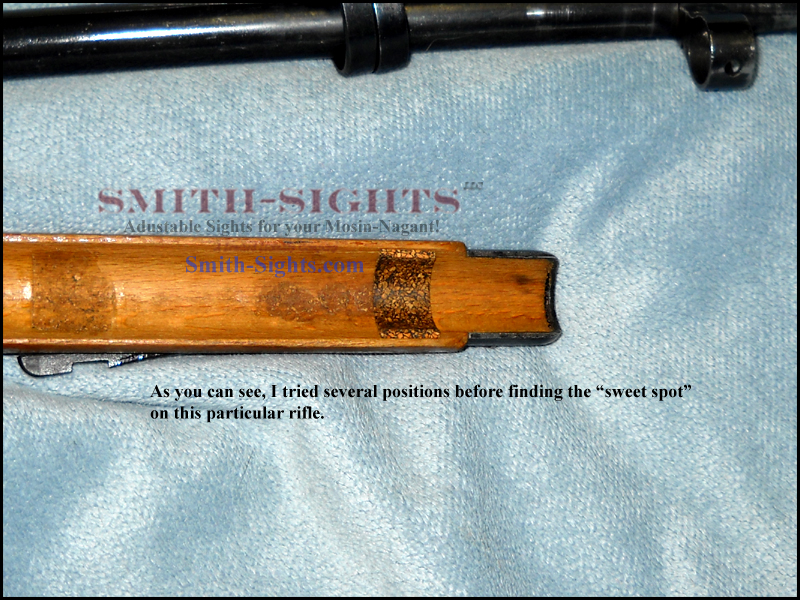
This is arguably the most important pressure point, the one at the end of the lower forearm/handguard. You might take it out and shoot it with the upper handguard off, trying several locations until you find the one that works best with your rifle. The location will usually be someplace in front. As you can see, I tried several spots from the forward band up.
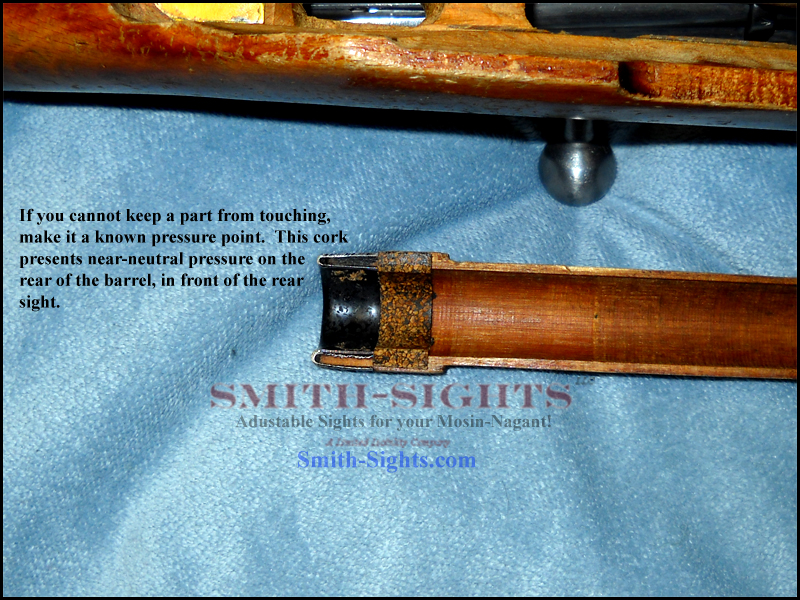
If you cannot, for whatever reason, keep a part from touching the barrel, make it known an of a known, consistent pressure. This piece of cork on the rear of the top handguard provides consistent downward pressure on the barrel, while at simultaneously being raised off of the lower stock by the "ears" which protrude between the two.
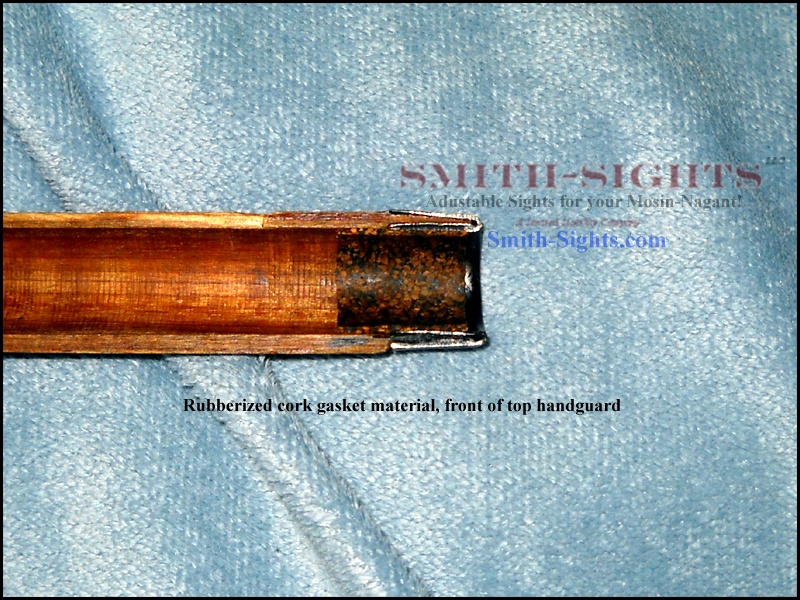
Another piece of cork on the front of the top handguard clamps the barrel between the upper and lower handguards, stabilizing the barrel and moderating harmonics, much like a BOSS system or LimbSaver barrel de-resonator.
Assemble your rifle and take it to the range. You can adjust the sights for final sight-in.

While you're there, you might challenge some modern rifles to a shoot-off!
I now sell these exact accurizing kits. The hard work is done for you!
Regards,Josh